
GETTING STARTED
The following instructions will help you to start using MINT Service Desk.
After getting the installation package from your purchase, you can go directly to installation steps below.
In case of any problems, you can always contact us at *https://www.mintsd.com/pages/contact* or directly by email: *support@mintsd.com*.
SCRIPT-BASED INSTALLATION
The installation of Mint SD with the use of installation script allows you to quickly launch the services. The script can generate all the data needed to run the service stack.
Installation of dependencies
Before starting services, you need to install Docker Engine. The process may be different for different systems. Installation methods are described in the *documentation*.
In order to unpack the package, it is also required to install ‘unzip’ application. This can be done in different ways depending on the system, depending on the package manager.
For yum (e.g. CentOS):
$ sudo yum install unzip
For apt-get (e.g. Ubuntu):
$ sudo apt-get install unzip
Older versions of Mint SD also required docker-compose to be installed.
Specific installation steps can be found in the *documentation*.
Starting new installation
Before starting the script, you need to put Docker in swarm mode with the command:
docker swarm init
After unpacking the package with a command, the ./start.sh script is located
in the main folder. Starting it will ask for passwords to the database, RabbitMQ,
and token-signing certificate. The script will request a server domain and then
generate SSL certificates, create individual secrets, load images of the services
from the archive, and start the service stack.
DOCKER-BASED INSTALLATION
Installation which uses only Docker is more complicated but allows more freedom to run individual elements of the system.
CONTENT OF services.yml FILE
The services.yml file contains a definition of all parameters that are
required to run. These are environment variables (in environment blocks) and
secrets (in secrets blocks).
The secrets block placed at the beginning of the file defines dependencies
to secrets and defines them as external.
The volumes block defines the mapping of volumes to the consistency of
database data and data bus.
Containers running in one Docker network can communicate with each other. By
default, each of them receives the same hostname as the name of the service
defined in the file (e.g. database for the Postgres databas, rabbitmq
for the bus, etc.).
Container images can be downloaded from the container register.
Complementing environmental variables
The environmental variables in the services.yml file that need to be
replaced are the following:
domain name, hidden under the
${FQDN}(from Fully Qualified Domain Name)system name -
${SYSTEM_NAME}, which is one of the validation parameters of the subscription token.
Additionally, in environmental variables in some services there is the name of the host on which RabbitMQ was launched. The default is:
rabbitMq__hostnames__0=rabbitmq
The domain name in the configuration is needed to:
setting up a token publisher in the
Authservicesetting up the default address of the front client in the
Authservicesetting up the location of the directions for the
Gatewayservice andAuthservice forFrontendservice
Completing the secrets
Secrets that are kept in the Docker’s database are passwords to the database and
data bus, connection strings to the database for various services, SSL
certificates for Reverse Proxy service and password encryption keys for
Mailing service. Information about secrets also can be fould in the *documentation*
Password encryption keys
Key secret for Mailing is MailingSecret respectively. It has a string GUID (globally unique
identifier) format. It is important that it does not have other characters e.g. End of Line.
Starting up services
Having prepared services.yml file with changed environment variables and
defined all necessary secrets we can now run services. For this purpose, we will
use the following command:
$ docker stack deploy --compose-file services.yml stack_name
The set of services that is running is called stack, hence the parameter: stack_name. To disable the whole stack of services we can use the command:
$ docker stack rm stack_name
We can also modify individual running services in the stack with the
docker service update command. More information about this command can be
found in the *documentation*.
FIRST LOGIN
Type your server IP on your web browser and login with the default admin account credentials (remember to change it):
Login: admin Password: admin1
Now, in order to start using Mint Service Desk you need to:
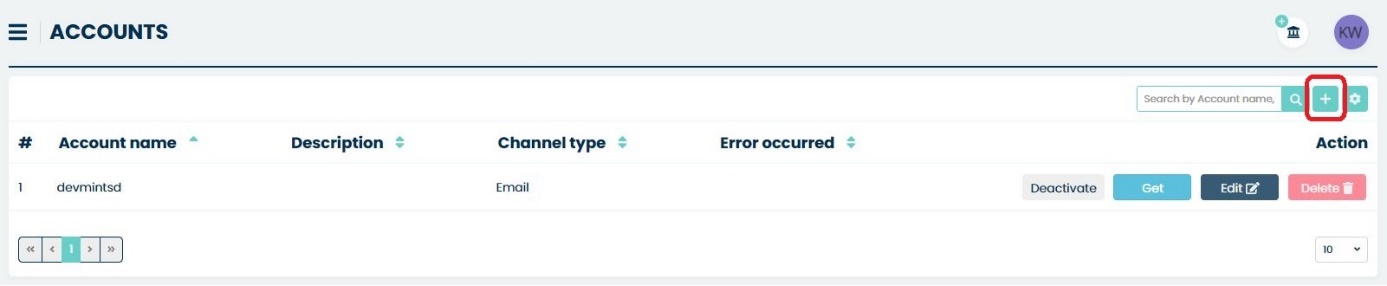
Define a new email account from which messages will be sent. You can do it in section Email > Accounts. Right here you need to click on the small
 button located on the right side of the search
bar.
button located on the right side of the search
bar.
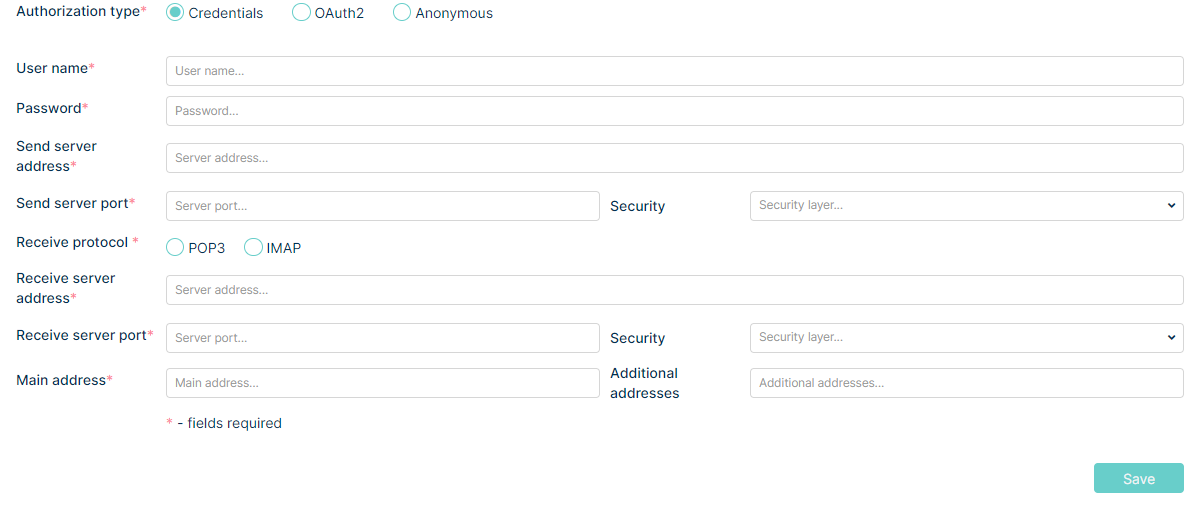
Inside the “Create Account” view you will need to fill up the required information (fields marked with a *). Also, you can add some additional information inside the “Description” text field.
Now, in the next view, you will need to select which email you’re using. You can choose:
Gmail
Yahoo!
Microsoft Office 365
Other
Microsoft Graph Api
After that fill up the necessary information – you will find more information about creating accounts in the Admin>Email>Accounts part of this guide.
Once you finish, click on the
button to finish the process and save the new email account.
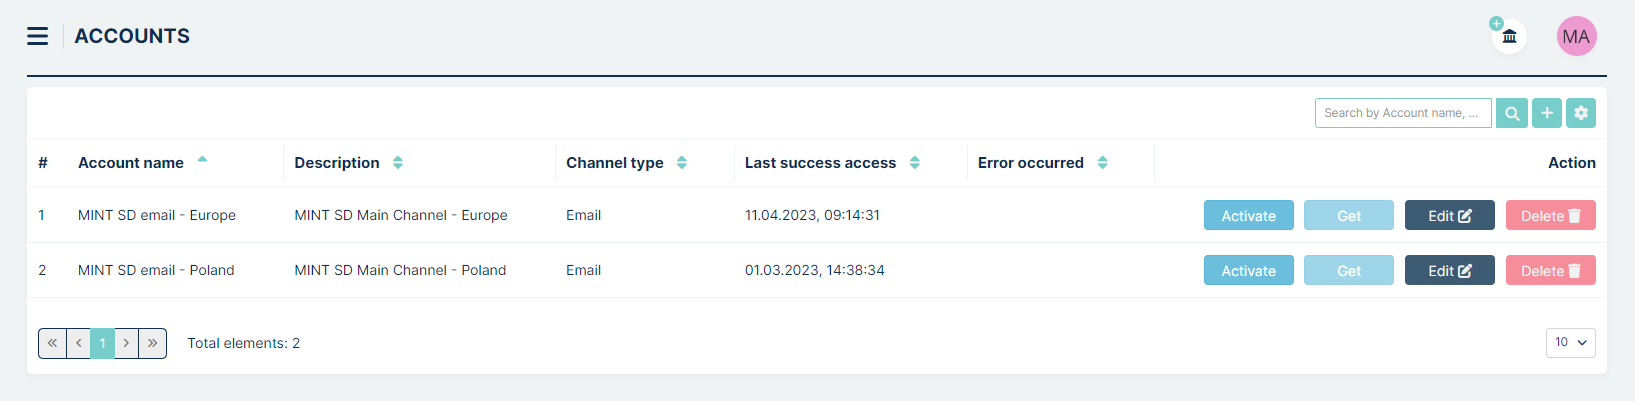
You will be moved to the list of existing accounts, where you will see a new position with some information about your new email account.
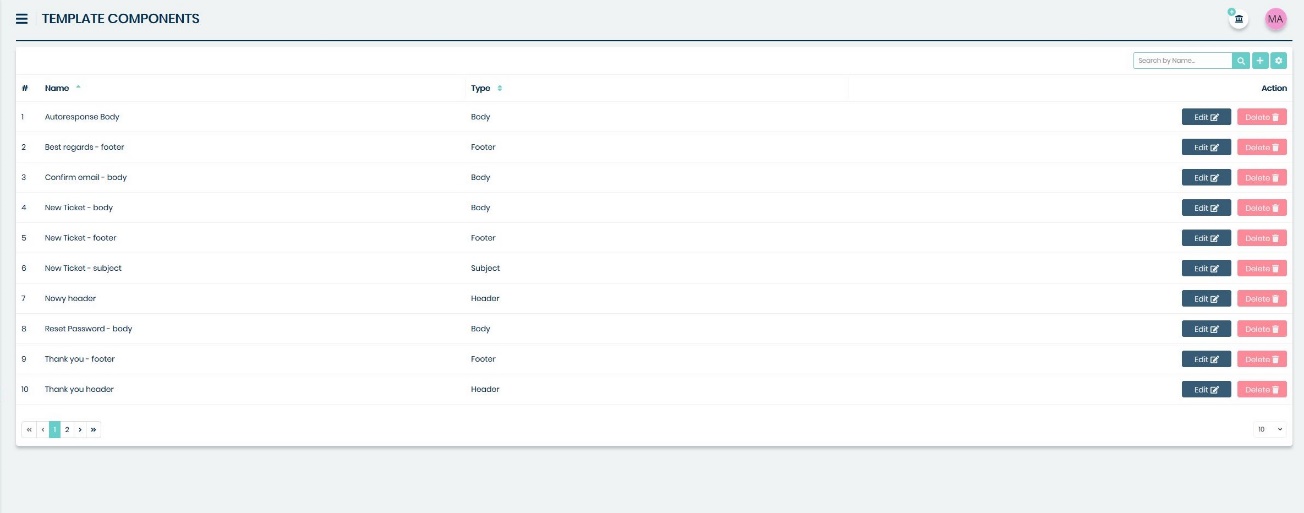
Define at least one “Body” type template component which includes at least ‘{{EmailURL}}’.
You can do it in section Tickets > Components.
Right here you need to click on the small
button located on
the right side of the search bar.
In the view responsible for creating a new template component click on the
button located right below the ‘Description’ section. Select Email > Url from the menu.
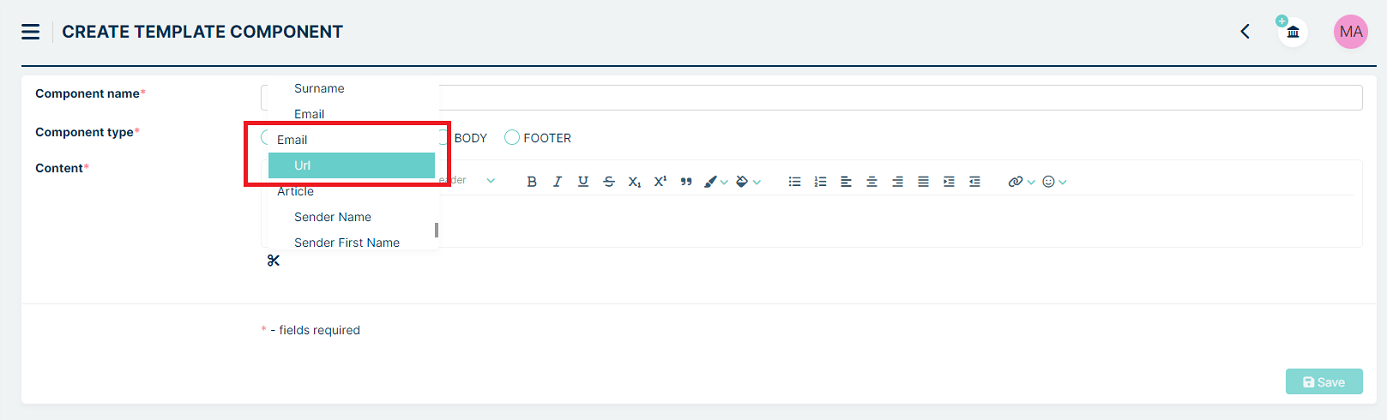
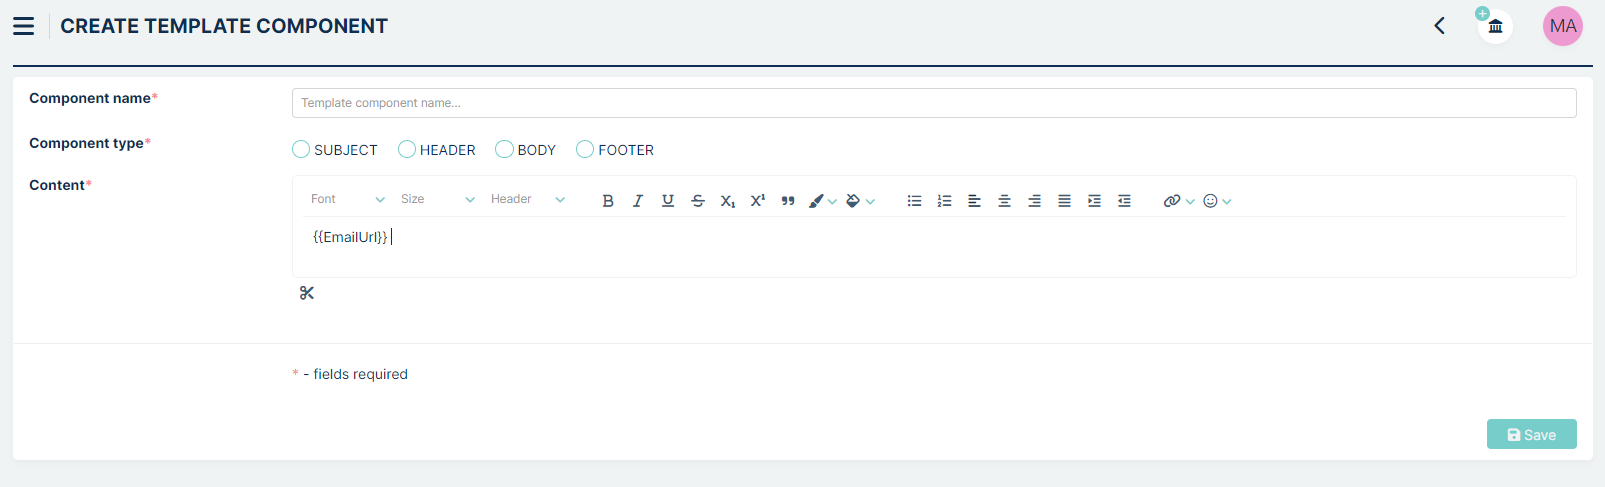
Now click on the
You will find detailed description regarding creating templates in the Admin>Tickets>Templates part of this guide.
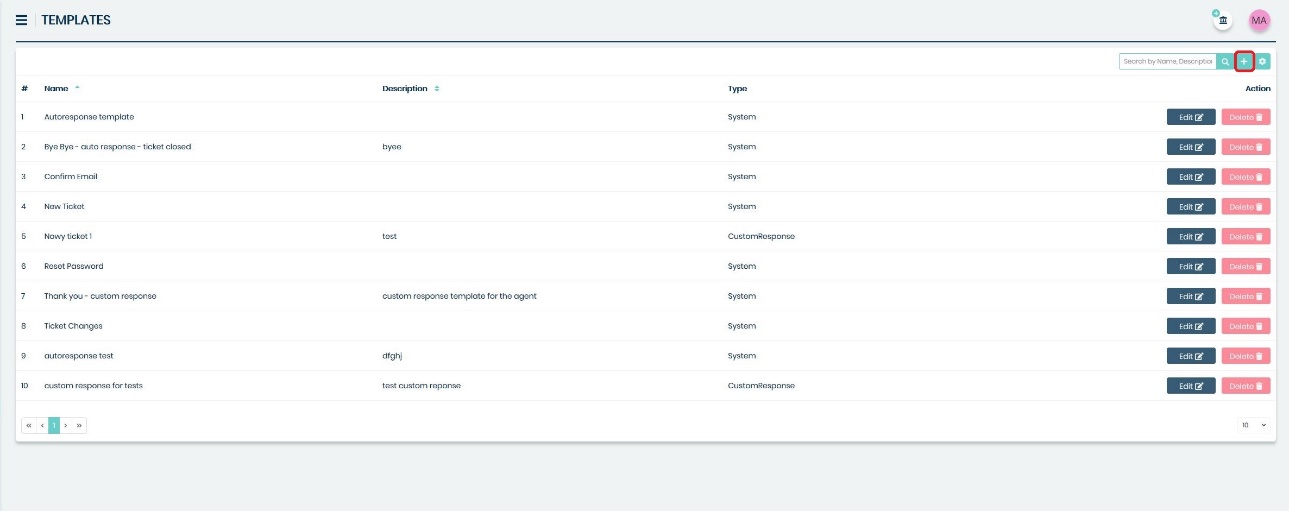
Define at least one template. You can do it in Tickets > Templates section.
Right here you need to click on the small
button located on the
right side of the search bar.
You need to choose a previously created Body type Component from the list in the ‘Select body’ section. Also, remember to create an appropriate name for this template and select “system” from the “Template type” part of this view.
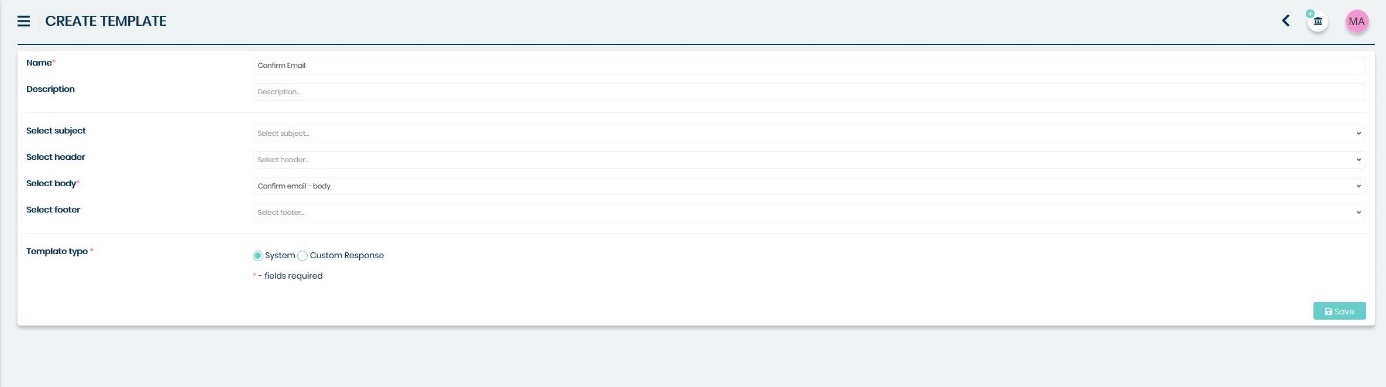
Click on the
Now you need to Set up ‘Email confirmation Template’. You can do it in the Settings>General>Templates and choosing already created template from the list in the ‘Email confirmation template’ section.
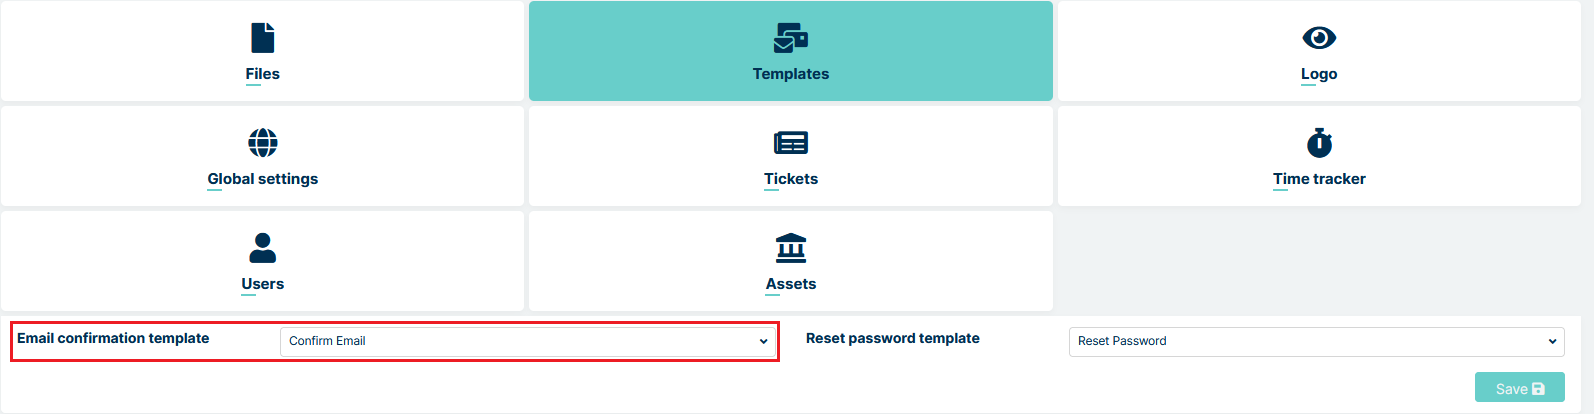
Once you do that, just click on the button.
Now you need to create at least one Agent type user. You can do in the Agents>Agents section. Right here you need to click on the small
button located on the
right side of the search bar.

Inside, in the ‘Create User’ view, you need to fill up all of the required information and click on the
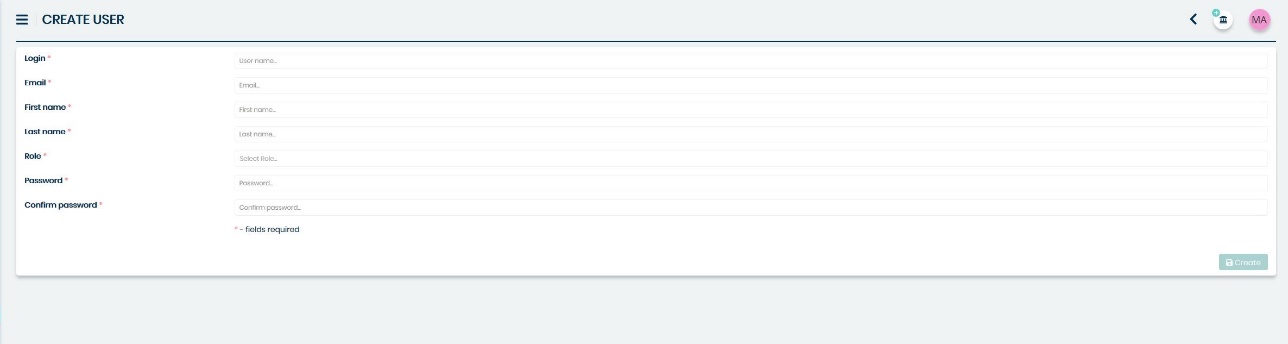
MINT Service Desk has one already predefined Agent role. If you want to learn more about adding and managing system Roles, you will find more information in the Admin part of this guide.
Once Agent is created, the first attempt to login will send a verification email to the new Agent on his email address (given during the previous step). It will include a request to validate his email address.
Once that’s done – you are ready to go.
UPGRADING
If you have a previous version of MINT Service Desk and you want to upgrade your system to the latest version, you can do it as follows.
First, you need to download the latest version of MINT Service Desk here:
*https://www.mintsd.com/pages/download-center*
Before using start.sh command you should use this one to disable MintSD
docker stack rm mintsd
This will remove stack with the name mintsd. Wait a few moments for the process to complete.
Then you just need to extract the package downloaded and run the start file.
Linux/OSX:
./start.sh
You are not going to go through all the same steps again like in the installation, the system will only apply the changes and upgrades needed from the previous version and it will keep your data safe.
BACKUP AND RESTORE
CREATE BACKUP
To start the backup process, get inside the container where the database is:
docker exec -it id_container /bin/sh
id_container to the database. When you enter the container you should enter:
pg_dumpall -U postgres --filename.sql
filename.sql filename with extension sql.
Then exit the container with the command:
exit
Once out of the container you should enter the command:
docker cp id_container:/filename.sql .
docker cp id_container:/filename.sql . copies a file with a copy of the database to the MINT machine
RESTORING DATA
To start the restoring process, copy the database dump to a container:
docker cp filename.sql id_container:/filename.sql
The next step is to get to the database container:
docker exec -it id_container /bin/sh
The final step is to type the command to restore the copy:
psql -U postgres -f filename.sql
SSL CERTIFICATES
In order to get a secure SSL connection, you need to replace the generated self-signed certificates with properly signed certificates.
Format of certificates
The Reverse Proxy service expects a public certificate in crt/pem
format.
Example ‘pem’ certificate:
-----BEGIN CERTIFICATE-----
MIID/TCCAuWgAwIBAgIUWOtKfWa9w1Fqh7ghzA+iflYebGAwDQYJKoZIhvcNAQEL
BQAwgY0xCzAJBgNVBAYTAlBMMRMwEQYDVQQIDApUZXN0X1N0YXRlMQ4wDAYDVQQH
DAVUZXN0IDEVMBMGA1UECgwMVGVzdF9OYW1lICAgMRIwEAYDVQQLDAlUZXN0X1Vu
aXQxDzANBgNVBAMMBkNvbW1vbjEdMBsGCSqGSIb3DQEJARYOdGVzdEB0ZXN0LnRl
c3QwHhcNMjAxMDA2MDg1MjQwWhcNMzAxMDA0MDg1MjQwWjCBjTELMAkGA1UEBhMC
...
WbVPWX706/s/tAgdXzz6AnVlUrErPPy+2zk0iZoIjLh1oXaqcLea4hXyFoRj6QBm
8Z8p3Fbm3NyyeEMTj91fu5UB647yU6ZBsW+dgiYBJaPuoKUrXbqZz/cQ92jnd+TF
6FzFOvXqM36Kl/dLmYibv0VXMjYT6PnY1nikBc2ve1aMM0TUR70Jb1U7Fv1FNH7V
/JhMr7rCO9UHL91KoF9t1Lc=
-----END CERTIFICATE-----
Example ‘key’:
-----BEGIN PRIVATE KEY-----
MIIEvQIBADANBgkqhkiG9w0BAQEFAASCBKcwggSjAgEAAoIBAQDW2KUzPcyf3mTo
HI4mm1UR9+cggDNn6Uufyur6kI2Qj+ILKBvwX/+SnBimGuEtJJjddiNJo/Ahu0LI
A01tsa0wfsGErtuGK/poPGlA47Ucq6bVbtnzDZp2Hn4bdGAHvqILRZldE8S9QT6x
hsl40JJVWN8aOrOTdyAo3OQ4CAORMOss1jod+44OTH8P/0OYQ/MLZNdwOXVBMqM9
qy28LXrxkfugGvGVIZiQGueAJSijzPmh0ydNvejhA1QnotJSb2QnVppPmtzk/sGM
...
Z4VW3myfK64qsRP3syGOFFcWDqZZe28dL/8LYb0CgYEA2W2nHVIu0cUIPT9tMvz7
nhNMuYCgP7yKWU4WCLkksLxfYL/zSdveCBddT0dFeq8chZzD4qeOHavwajYosEej
M1q9Obq7vOkDtB3GqJHNp+1CCJvzZAW2Aca5FR+mnIZ1JgzVC6f2/m0fPpyksJaL
LtosfA36JGx73J3QRshFNHg=
-----END PRIVATE KEY-----
Generating self signed certificates
The easiest way to generate a certificate is to have Linux system with
openssl installed. You can then use the command:
$ openssl req -newkey rsa:2048 -new -nodes -x509 -days 3650 \
  -keyout "privkey.key" -out "fullchain.pem" -subj \
  "/C=PL/ST=Test State/L=Test /O=Test Name\
  /OU=Test Unit/CN=Common/emailAddress=test@test.test"
Certificate replacement in docker secret
Unlike environmental variables, the secret cannot easily be replaced. To do so,
the secret must first be unplugged from the running Reverse Proxy service.:
$ docker service update --secret-rm Certificate__pem --secret-rm CertificateKey__key mintsd_reverse-proxy
Then we must remove the existing secrets from the secret database.:
$ docker secret rm Certificate__pem CertificateKey__key
The next step is to create new secrets from the key and certificate. Use the following commands:
'$ docker secret create Certificate__pem certificate_name.pem'
'$ docker secret create CertificateKey__key key_name.key'
Finally, the newly created secrets have to be connected to the Reverse Proxy
service.:
$ docker service update \
  --secret-add source=Certificate__pem,target=/etc/ssl/private/fullchain.pem \
  --secret-add source=CertificateKey__key,target=/etc/ssl/private/privkey.key \
  mintsd_reverse-proxy
USING LET’S ENCRYPT - FREE SSL CERTIFICATES
Let’s Encrypt allows you to generate a signed certificate for free by using the command:
$ sudo certbot certonly --nginx
Detailed installation and usage instructions can be found in the documentation:
NOTE:
In order to run certbot application you need ports 80 and 433 and an assigned
domain. Therefore, the application cannot be launched if Mint SD has already
been launched and occupies the ports.
Automatic certificate upgrade
By adding the certbot command to /etc/crontab you can force a new
certificate generation after a certain time.
Below you can see the example of using /etc/crontab:
$ echo "0 0,12 * * * root python -c 'import random; import time; time.sleep(random.random() * 3600)' && certbot renew -q" \
  sudo tee -a /etc/crontab > /dev/null
However, with the Reverse Proxy service running, updating the secret where it
is located may be non-trivial.
For best results it is good to take the reverse proxy configuration to the host
machine. Thanks to this, updating the environment will only consist of replacing
certificates by certbot.
Details of reverse proxy configuration can be found in the next part of this guide.
REVERSE PROXY
Reverse Proxy service is used to split traffic directed to one domain into
different services. The determination to which service it should be redirected
is based on url address. In the service stack, three other services are hidden
directly behind Reverse Proxy. These are: Frontend, Gateway, and
Auth.
Configuration of redirections
The redirection configuration is in the nginx.conf file in the server
block. Built-in reverse proxy contains 4 location blocks.:
location /api/ {
  proxy_pass http://gateway/api/;
  include common_location.conf;
}

location /livereloadHub {
  proxy_pass http://gateway/livereloadHub;
  proxy_http_version 1.1;
  proxy_set_header Upgrade $http_upgrade;
  proxy_set_header Connection "Upgrade";
}

location ~* ^/(idp|connect|\.well-known|Account|external) {
  proxy_pass http://auth;
  include common_location.conf;
}

location / {
  proxy_pass http://frontend;
  include common_location.conf;
}
The first block redirects all requests in https://domain.name/api/ format
to the Gateway service.
The next block, in addition to redirecting traffic from
https://domain.name/livereloadHub to the Gateway service, specifies the
possibility of communication via the ‘web socket’ protocol.
The third block defines a series of redirections to the Auth service, such
as the login page, OpenID connect or static resources used on the login page.
The last block redirects all other requests to the Frontend service.
The common_location.conf file contains a definition of the headers needed for
the proxy to work properly. These are headers such as X-Forwarded-For,
X-Forwarded-Proto, X-Forwarded-Host or X-Forwarded-Port.
SSL Configuration
Basic SSL configuration can be found in ssl.conf file. The file contains the
definition of supported protocols, encryption definition and certificate
location, which is set to /etc/ssl/private/ by default.:
ssl_certificate             /etc/ssl/private/fullchain.pem;
ssl_certificate_key         /etc/ssl/private/privkey.key;
Reverse proxy on the host machine
The resignation from the standard reverse proxy running in the service stack allows for a wider configuration of settings.
Changes in the services.yml file.
To properly run services you need to make some changes to the service definition
in services.yml file.
1. Ports from Frontend, Gateway and Auth services should be exposed
directly. If you take one them as an example, it looks like this.:
gateway:
   image: mint/gateway:latest
   ...
   ports:
     - port_on_which_we_want_to_start_service:80
2. The definition of Reverse Proxy service must be removed from the
services.yml.
Note: Ports defined in this file will be needed later in reverse proxy configuration. When you start the stack, the services will be directly visible on the host machine.
Definition of reverse proxy
HTTP reverse proxy can be defined using different HTTP servers. In this case
nginx will be used. The initial configuration will be twinned to the one
existing in the default Reverse Proxy service.
In Docker Swarm, the network interface driver is ‘overlay’ type. This means that
services will NOT be visible at the localhost address. You can use the
ip addr command to check the access address to the stack.
The result should be as follows:
...
5: docker_gwbridge: <BROADCAST,MULTICAST,UP,LOWER_UP> mtu 1500 qdisc noqueue state UP group default
    link/ether 02:42:98:4e:fe:bc brd ff:ff:ff:ff:ff:ff
    inet 172.21.0.1/16 brd 172.21.255.255 scope global docker_gwbridge
       valid_lft forever preferred_lft forever
    inet6 fe80::42:98ff:fe4e:febc/64 scope link
       valid_lft forever preferred_lft forever
...
The address assigned to the docker_gwbridge interface is the address that we
will use later when defining the reverse proxy configuration. In this case it is
127.21.0.1.
Changes that need to be made in nginx.conf in relation to the built-in ‘Reverse
Proxy’ are only redirection addresses. Instead of http://gateway you should
use http://ip_address_docker_gwbridge:the_port_where_the_service_was_exposed.
The same for other location blocks.